It’s very important for beginners who just started playing lacrosse to learn how to throw a lacrosse ball effectively.
A huge part of making effective lacrosse throws involves utilizing the core strength of your body, but there are other considerations as well.
Before employing your core strength, you first need to have mastered the basics which range from proper gripping of the lacrosse stick all the way to the throwing motion itself.
Looking for the best lacrosse complete stick? Check out our top picks!
| Product Image | Lacrosse Stick Name | Recommendation | Check Price |
|---|---|---|---|
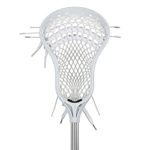 | StringKing Complete 2 Senior | Best Stick For Attackers | Check Price |
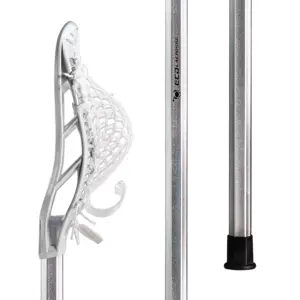 | ECD Bravo 1 | Best Stick For Middies | Check Price |
 | STX X10 | Best Stick For Defenders | Check Price |
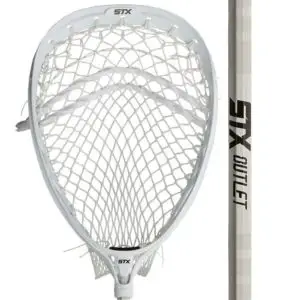 | STX Eclipse 2 | Best Stick For Goalies | Check Price |
7 Tips to Help You Learn How to Throw a Lacrosse Ball
So what are some of the basic tips you should be using to ensure a perfect throw?
This article will help you learn how to throw a lacrosse ball in a matter of days. It’s easier than you think.
Let’s get into it!
Tip #1: Proper Hand Placement (Grip)
Holding a lacrosse stick properly is one of the most fundamental skills of the game, and it is often one of the most overlooked aspects to reaching your full potential while out on the field. So what’s the ideal way of holding a lacrosse stick? First off, your dominant hand should be placed above your non-dominant hand, and the positioning of the top hand is particularly important because going too high up will result in a less powerful throw and going too low would affect your control of the stick.
Start by placing your non-dominant hand on the butt of the stick, holding it firmly as if you are making a fist. Your dominant hand then goes near the middle of the stick, gripping it as if you were shaking someone’s hand. Depending on whether you are using a long or short stick, however, you might need to adjust the placement of the bottom hand to whichever position feels comfortable.
While you use your top hand to push the lacrosse stick over your shoulder, you use the bottom hand to guide the stick. As a result, therefore, holding a lacrosse stick is a push-pull motion whereby the top (dominant) hand is the push hand, and the bottom (non-dominant) hand is the pulling hand.
Perhaps this explanatory video by Paul Rabil will better explain the concept of proper hand placement and grip:
Tip #2: Be Ambidextrous
One of the hallmarks that define an accomplished lacrosse player is the ability to throw with both the dominant and the non-dominant hand and throw very well in either instance. Serious players always aim to accomplish this, and responsible coaches always push their players to embrace ambidexterity.
When a player knows how to throw a lacrosse ball well with both their dominant and non-dominant hand, it gives them an advantage on the field because then, they can easily switch hands thus throwing off the opponent. Gaining the confidence and skill that is required to throw with both hands requires a combination of persistence, proper mechanics and daily practice, but hard as it sounds, it is very achievable.
Initially, you might find that you are not as fast enough, or your shots are not as accurate as they should be, but this is just part of the process. Just keep at it and eventually, you will find that you have perfectly mastered the art of throwing with both your dominant and non-dominant hands which is an incredibly enviable and valuable skill in the sport. Better yet, you might find that practicing with a teammate will make the whole process much more enjoyable.
Wondering how to get started? Perhaps this video might help:
Tip #3: Establish Your Lead Foot and Your Anchor Foot
Just the same way there is a dominant hand and a non-dominant hand, there is also a lead foot and an anchor foot when playing lacrosse. There are several simple exercises that a player can undertake to distinguish their lead foot from their anchor foot for instance:
- When you cross your arms which one goes underneath? Your anchor foot will be the foot on that side of your body.
- When you do some falling starts with your heels placed together, which foot do you step forward with first? This is your lead foot.
The general rule of thumb is that your lead foot will be the one opposite your dominant hand. So if you are a right-handed player, you will find that you place your right foot at the back (serving as the anchor) and your left foot forward (serving as the lead). The reverse is true for left-handed players.
Having a lead and an anchor foot allows you to open your hips and this leads to the generation of power as you twist your torso ready to make a throw. Stepping to the target with the correct foot is, therefore, a vital part of playing optimally.

Tip #4: Body Positioning
When you are ready to make a throw, the correct way to stand is with your body square, perpendicular to the target. Depending on whether you are making a pass or taking a shot, the target here could be your partner’s stick head where you intend to direct your throw, or it could be one square of the net.
Whichever the case, your hips and shoulders on the side of the non-dominant hand should be aimed at the goal, with your torso rotated away. Additionally, hold your head still and have your eyes fixed on the target.
Both your legs should be bent slightly but to ensure that you give your shot enough momentum, the lead foot should be bent a little more than the anchor foot. Additionally, place slightly more weight on the anchor foot than you do on the lead foot because this will generate the momentum you need as you swing around stepping towards the target as you make your throw.
As far as the arms go, push them out and lift them, instead of holding them close to the sides of your body. For an effective throw, make sure the lacrosse stick’s head and butt cap are in line with the target. Additionally, always keep in mind that your elbow will show where your throw goes so if your elbows are too high, the ball will go too high and vice versa. With your arms lifted in the air, swing them back and simultaneously, your anchor foot will drop back.

Tip #5: Throwing Motion
In lacrosse, the throwing motion employs the concept of continuous acceleration whereby you start slow and gradually speed up. This is an important thing to remember because if a player starts abruptly, then the ball could easily fall out on the ground behind them.
For the throwing motion, start by bringing both hands to your chest level while you are holding the lacrosse stick. You then pull the stick back on the side of your dominant hand, all the while making sure the stick stays parallel to the ground and that your elbows are bent slightly. Using your dominant hand, you then push the stick hence bringing it over your shoulder and in front of you. Remember to stabilize the stick using your non-dominant hand and snap the wrist of your dominant hand.
While moving the stick over your shoulder, you should simultaneously step forward with your lead foot with the big toe pointing towards the target. The force of your push hand thrusting the stick over your shoulder is what propels the stick forward, therefore, creating the throwing motion that sends the ball flying towards the target.
The vital thing to remember when learning how to throw a lacrosse ball is that it involves a compound motion whereby all the movements have to be undertaken simultaneously. The wrist snap and the pullback give the ball speed and allow it to fly with a straight trajectory instead of an arching one, so they are vital components of a perfect throw.
Tip #6: Follow Through
The perfect throwing motion isn’t complete without a follow-through. This involves moving the stick in the direction of the throw even after releasing the ball from the stick head. Follow-through is important because it not only improves the accuracy of your throw but also ensures that the receiver is aware that a pass has been made and keeps them alert in readiness to catch the ball.
Once the ball has left the pocket, simply let the stick continue with the momentum instead of stopping it abruptly, and bring your anchor foot forward to meet the lead foot. When you are done, the pocket should be pointing in the direction of the target, therefore, making the complete arc of your stick, a diagonal line running from the top of your push hand to the bottom of your non-dominant hand.
Tip #7: Practice Shooting From Different Angles
The ideal situation is always to be able to make throws while you are standing directly in front of your target. However, this might not always be possible because most of your shots during a game could be difficult to make. For this reason, get accustomed to shooting from different angles as this would be a better representation of less-than-ideal on-field conditions.
During practice sessions, perform drills that force you to shoot from the left and right of your target and those that also force you to shoot from down low and also from high over your head. Work on your sidearm as well and perform drills where you aim to throw at one particular point such as the top or bottom corners of the goal.
Get a lacrosse goal in the backyard to start practicing today
Final Words On How To Throw a Lacrosse Ball
Beginners often start with mastering the basics of a throw, after which they then work on their speed and accuracy. It takes a ton of exercise and daily practice to be able to learn how to throw a lacrosse ball effectively so do not be too hard on yourself if you do not get it right all at once.
The best part is that daily practice will not only build up your hand speed, but will also develop your muscle memory. Muscle memory would allow you to throw with more ease and help prevent muscle-related injuries which can be quite common among professional lacrosse players.
In addition to throwing a lacrosse ball, here are other fundamental lacrosse skills you’d need to master:
For more go check out “How To” training page


