Out of all the talks about prepping a good game look, I think getting some tilt in helmet and putting some eye black are the two best things you should do. They not only make you look badass but also offer great protection for your head and vision.
In this post, we will walk through what tilt means, why you should care and how you can get an optimal level of tilt based on your skill level. But first, let’s take a moment to explain what tilt is as it’s not in fact an official term:
The term “tilt” refers to the level your helmet sits relative to your eye level. In other words, it describes how low the helmet sits on your head. Levels of tilt include no tilt, low, medium and high. A low tilt means you tilt the helmet backward so that you see through the lower second and third face mask bars. A high tilt means you tilt the helmet forward so that you see through the top first and second face mask bars.
In addition, tilt offers an intimidating look on the field which players often desire especially in important games.
What are the different levels of lacrosse helmet tilt?
If you are a new lacrosse player and haven’t worn a lacrosse helmet before, tilt might be a strange concept. All it really means is the helmet tilt. When you wear a lacrosse helmet, it’s fairly easy to adjust the helmet by tightening or loosening the chinstrap and moving the helmet back and forth.
For the first few times putting on a brand new lacrosse helmet, you should spend some time trying different levels of tilt to make sure it’s at the optimal level of comfort. This then leads to the topic of this section, the varying degrees of helmet tilt players and coaches use.

- No Tilt
Wearing a helmet with no tilt basically means you are looking through the third face mask bar and the helmet is “sitting” on your head. This is not a correct way to wear a helmet on any occasion unless you just finished practice and are ready to take off your helmet.
Most beginner players will have trouble wearing the helmet the first few times so this could happen to beginners. If you notice you have put the helmet too backward that doesn’t block any sunlight and is very loose, you likely have “no tilt”.
- Low Tilt
If you know what a no tilt is, not too hard to guess what a low tilt is from there. It’s slightly better than having no tilt in terms of the field of vision but the helmet visor is still well above eye level.
It fails to block most of the sunlight if any at all. Low tilt could be seen as an intermediate step as beginners grow their game after they know no tilt isn’t the proper way to protect their head and face.

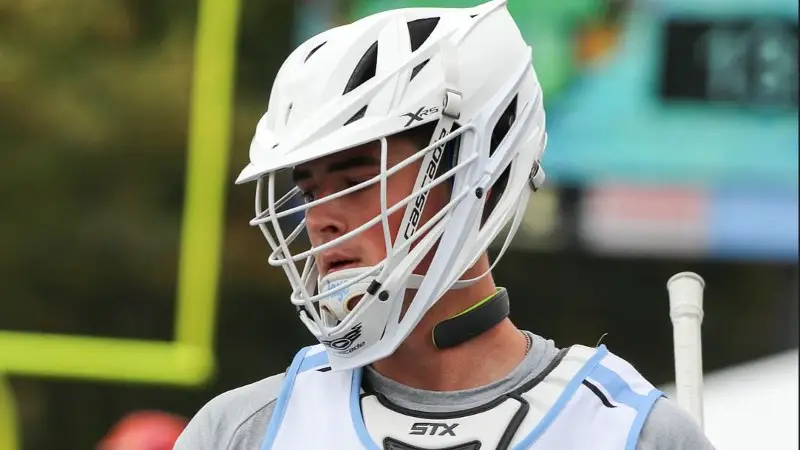
- Medium Tilt
Right at the sweet spot, this is also the tilt level at which most lacrosse players wear their helmets. Seeing through the first and second face mask bars, players get uninterrupted visibility and also the feeling of comfort and safety.
Therefore, most players from intermediate to elite skilled prefer this tilt level. Not to mention, they probably progressed from having no tilt to medium tilt and decided this is the best level for them.

- High Tilt
Now I present to you the most elite tilt level, high tilt. High tilt means your visor is slightly over the eye level. In fact, I tried it before by dipping the helmet very far forward that it hindered my vision to an extent. That said, it did a great job keeping sunlight and glares out of my eyes.
A high tilt is for elite players because it shows that you don’t need a good vision to be the best. It also intimidates your opponents as they can barely see your eyes.
The bottom line is there is a very fine line between looking cool and impeding your visibility. By experimenting with varying levels, you want to find the perfect tilt to best match your skill level and preference. The goal is to look cool without sacrificing visibility and safety.
Why should you care about lacrosse helmet tilt?
Needless to say, collegiate players and above are mildly obsessed over tilt. Why? A brand new helmet is expensive; players want to wear it the right way to not only showcase their skills but also show off their newest look.
Apart from the look, the tilt of a player’s helmet has many important safety concerns you should take note of.
Too little tilt
This applies to no and low tilt. Not having sufficient tilt exposes you to the risk of getting your helmet knocked off.
When your helmet isn’t securely strapped in, it can easily pop off in the midst of physical contact. Furthermore, your chin is also exposed to potential blows and injuries. The helmet should never “sit” on your head; it needs to protect your entire face from top to bottom.
Too much tilt
Players who opt for excessive tilt are at the risk of compromising their vision on the field. Especially if you are catching a clearing pass, you might need to raise your chin to see it.
This certainly causes safety concerns. With the top half of your view blocked off, you are in a vulnerable position of catching side checks and strayed shots. A bad vision also leads to poor performance.
Hence, to avoid serious harm, you should wear your helmet at a medium level of tilt. This is the level that ensures the best safety and visibility. Because everyone has a different head shape, you will need to experiment to find the sweet spot.
How to get a good tilt on a lacrosse helmet?
In this section, let’s go over the key steps to ensure you get a good tilt on your helmet.
- Make sure you select a correct size helmet (see the sizing chart here)
- Place the helmet on your head and adjust the helmet to a comfortable position. If the helmet feels loose, slowly tighten the knob to get a snug fit. And vice versa. Additionally, most helmets come with removable padding on the sides, so if it feels too tight, consider removing them.
- At this point, you want to ensure you are seeing through the top two bars comfortably.
- Next up, it’s time to adjust your chinstrap. It’s easier if you have someone helping you at this step. Hold the chinstrap to your chin and then adjust the top straps. The straps should follow your jaw line and be equal length from chin when buckled on each side.
- Once you are done with the top straps, repeat the same action for the bottom straps.
- Finally, check your comfort and tilt level once again. Then you are all set.
If it’s hard to visualize and follow the steps, watch this clip below to get a good tilt on your lacrosse helmet.
Conclusion
Helmet tilt is more art than science. What’s more important is you can properly wear a helmet without sacrificing visibility and protection.
Medium tilt is the most popular option by far. At the end of the day, as long as you can deliver a great performance, you don’t need to be very concerned.